Tabla de contenidos
Introduction
Being sovereign of your resources is not an easy task and the custody of own funds in Bitcoin, or any other crypto, is a burden that we are not used to. An error in saving, disordered words, illegible words or the total loss of our seed can cause us to lose everything.
This I have mentioned can really happen to us with any digital data to which we have assigned a value, either sentimental as photos or videos of a trip or an economic value such as our cryptos. And for all this there is a solution and it is to make BACKUP COPIES, something to which not many dedicate enough time.
In the case of Bitcoin, or other BIP39 compatible cryptos, we have a fantastic invention that is the BIP39 mnemonic seed that allows us to save our funds easily. With 12/24 words, in a specific order and the corresponding passphrase (word 13/25), we can now recover our portfolio.
Looking for the best option
There are multiple options to do the security save.
- A paper or a cardboard.
- Text file inside a «pendrive» and with good encryption.
- Divide it into parts and send it in several emails with encryption.
- A QR code of the seed hidden in a physical item.
- Steel wallet to stamp the words.
Of these options, the one that has always impressed me the most has been stamping the words on a steel plate. It is a formidable idea that allows you to withstand various inclement weather such as fire, blows or the weather itself. And even if someone gets hold of them, without the seed passphrase they won’t be able to access what we have in it.
These plates are known to all as STEELWALLET and there are several companies that are dedicated to their manufacture with prices ranging from $ 40 to $ 300.
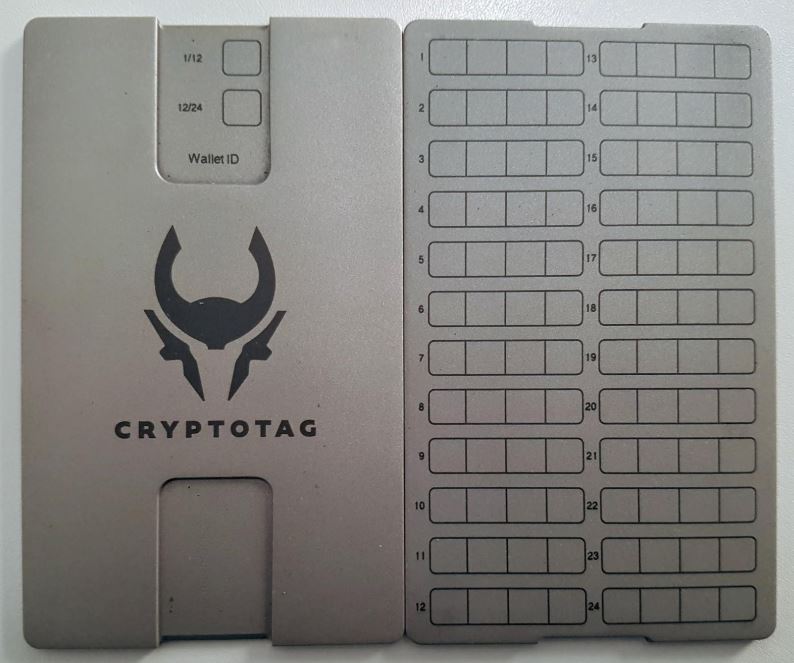
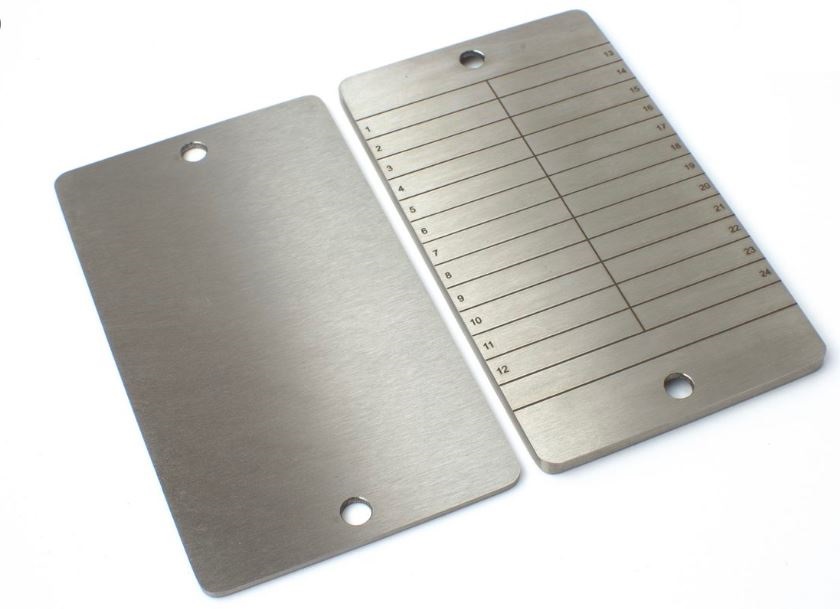
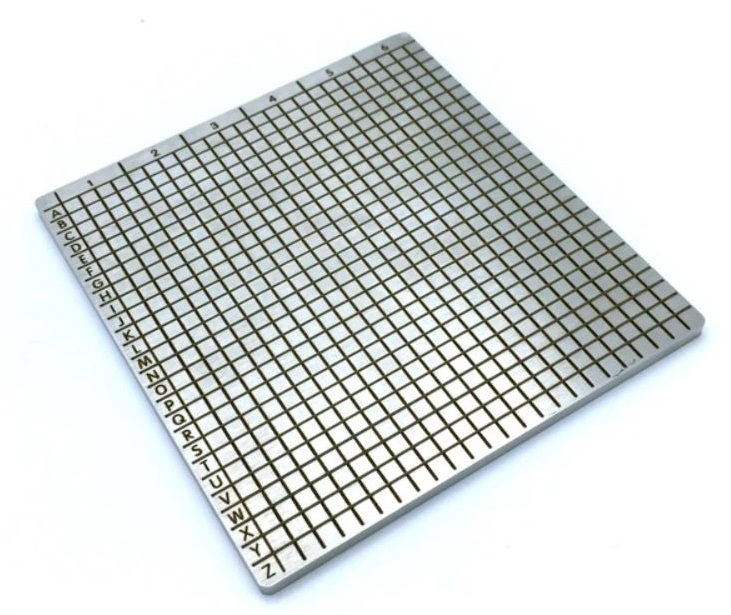
Prices that we can assume due to the important task to which they are destined, but there is an important point that has made me reach the reason for this guide:
Be as autonomous as possible in my sovereignty and avoid third parties as much as possible.
Good, nice, cheap and safe
Being able to manufacture this steel wallet myself, without depending on others, was what made me get down to work and look for the best option. The steel plate seemed the best option of all and you would only have to go to a shop that works with steel plates and order a few with a size similar to those that are sold.
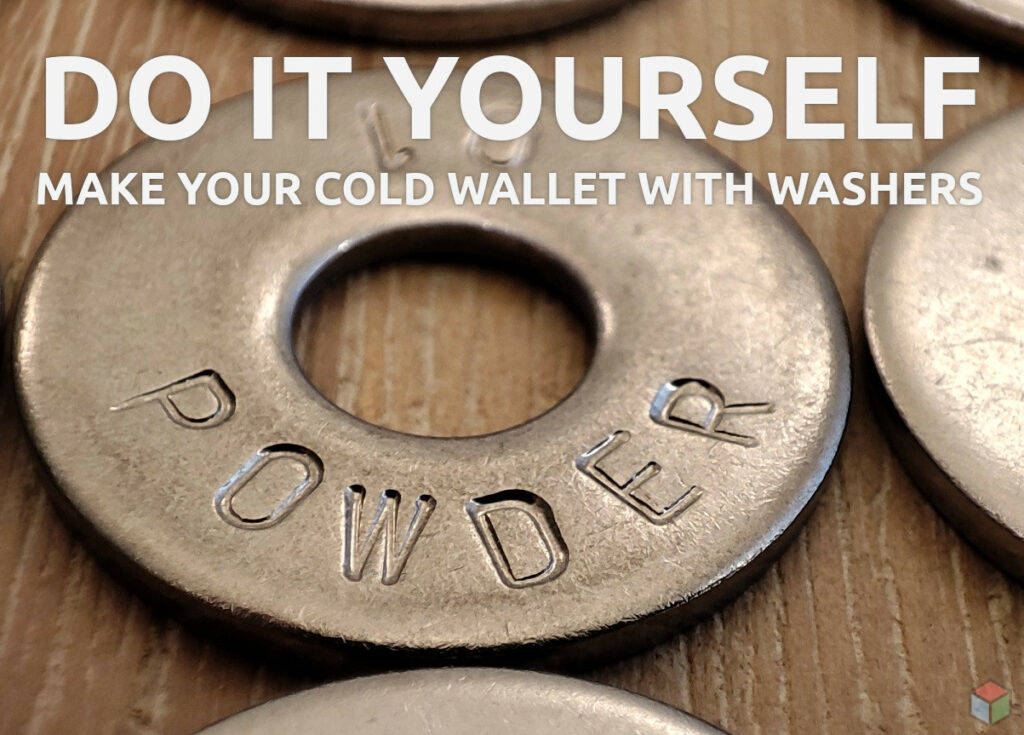
But by chance in life, I discovered a wallet online that consisted of simple steel washers, a bolt and a nut. The origin of this is the web of: James Stanley.
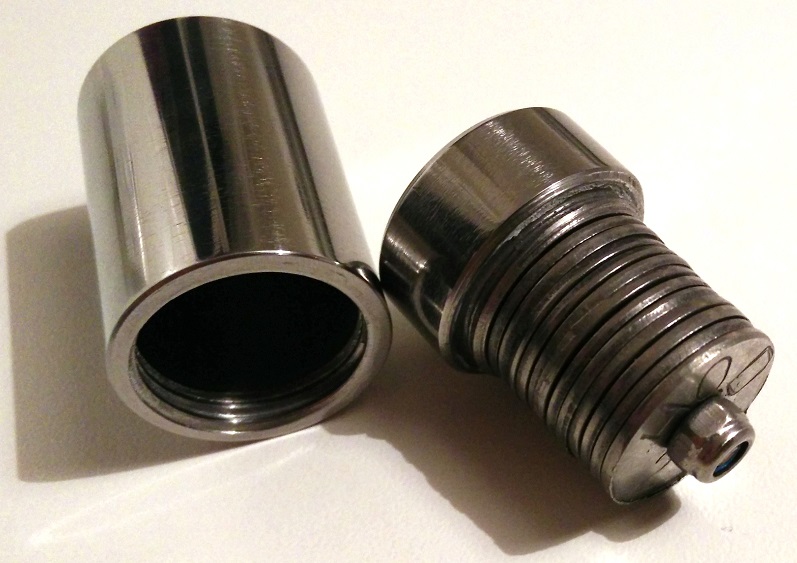
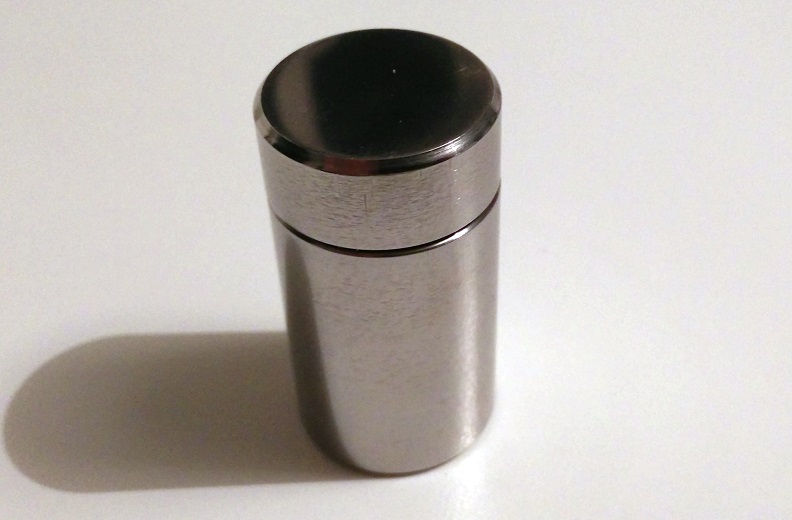
If you think about it, once you have the essential tools such as the hammer or the punches with the characters, when you want a new copy, you will only have to go to the hardware store and ask for what you need, making the following copies very cheap compared to purchased steel plates.
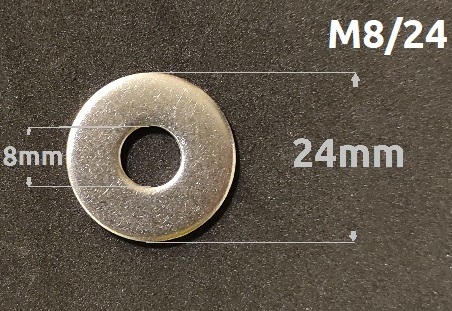
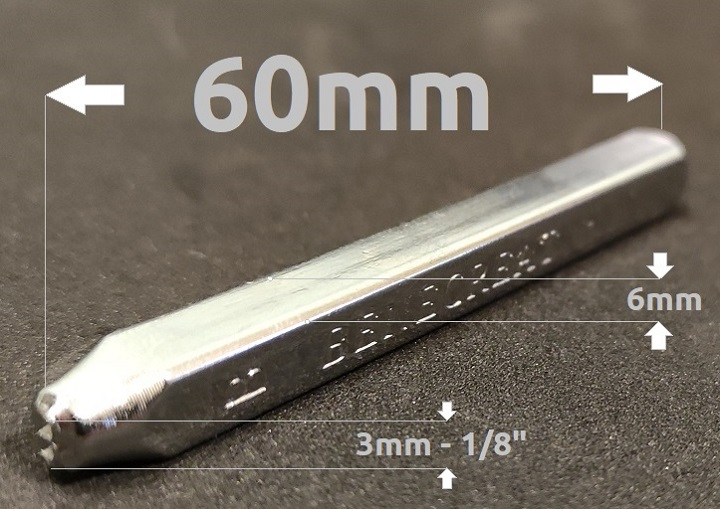
The punches I had already bought and are 3mm in size, carbon steel bought from Amazon. There is nothing special about them, but they forced me to make the washers be a related size. The M8 / 24 washers are the ones I have chosen and are perfect for these punches.
Parts and tools needed
NOTE: Washers, bolts, and nuts are purchased from a local hardware store. All prices are approximate.
Pieces
- Washers: M8/24 | Price: 0,10$
- Screw: A2-70 | Price: 0,80$
- Wing nut: Para Tornillo M8: | Price: 0,60$
Tools
- Hardened steel punches: Letters/numbers: 3mm – 1/8″| Price: 20$
- Hammer: Normal (MALLET tipe preferably) | Price: 20$
- Optional: Anvil | Price: 20$
Others
- Mold to guide punches: Made with 3D printer | Price: 2$
- Any type of electrical tape | Price: 1$.
Where to buy (US)
- Hammer: https://amzn.to/3fIAaOL
- Hardened steel punches: https://amzn.to/4lcVZpc
- Washers (M8/24): https://amzn.to/44zaIUo
- Anvil: https://amzn.to/46v7bJj
- Blockmit Jig: https://amzn.to/4608Vu8
Where to buy (Europe)
- Hammer: https://amzn.to/403gbS2
- Hardened steel punches: https://amzn.to/44hy2az
- Washers (M8/24): https://amzn.to/4lCqAfE
- Anvil: https://amzn.to/405XgpM
- Blockmit Jig: https://www.cryptocloaks.com/product/blockmitjig
Final price
Here is the total price not including the anvil, which would be 20$ more. It would be necessary to discount elements that one may have such as a hammer, electrical tape, punches, etc. Once you have the tools, you only have to buy the washers, the screw and the nut every time you want to add a new copy.
I advise buying more washers than necessary due to the errors that may occur and the tests that I recommend doing before starting with the hammering.
- Pieces: 24 washers + Screw + Nut = 3,80$
- Tools: Punches + Hammer = 40$
- Others: Mold + Insulating tape = 3$
- TOTAL: 46,80$
Part sizes
Not everyone has a 3D printer and perhaps someone is lucky enough to have a friend or acquaintance who can print the part. It takes 1H in the base and 35min in the mobile part. It consumes a few grams of plastic and I calculate that the total price is € 1-2. It is possible to make the same with other types of molds, wood type, porexpan plastic or whatever works as an option.
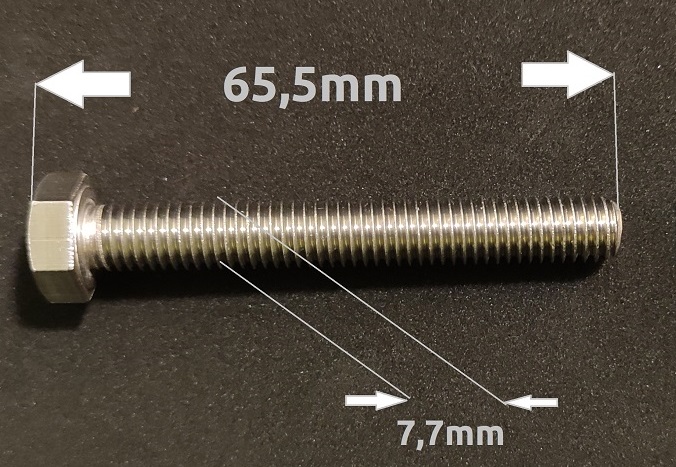
Below you can see the sizes used for the washers, screw and punches. The size of the mold is on the tinkercad website
Manufacturing the mold
At first, I had not thought of doing the process with a mold, but in the first test I did, the result was bad. The letters were scattered, out of order and very chaotic. He could hit it well twice and the third time the punch would fly. Then I realized to make a small support so that the result was somewhat orderly.
I have done it on the website of tinkercad that allows you to create, online in a browser, parts to print on a 3D printer. It does not have the same quality or precision as doing it with a specific program, but it has been more than enough for this task.
Mold discharge
Tinkercad: Original download to modify it
https://www.tinkercad.com/things/6LnKVMshm6o
Thingiverse: Download the result
https://www.thingiverse.com/thing:4590734
First versions to show the change between my initial idea and the final result:
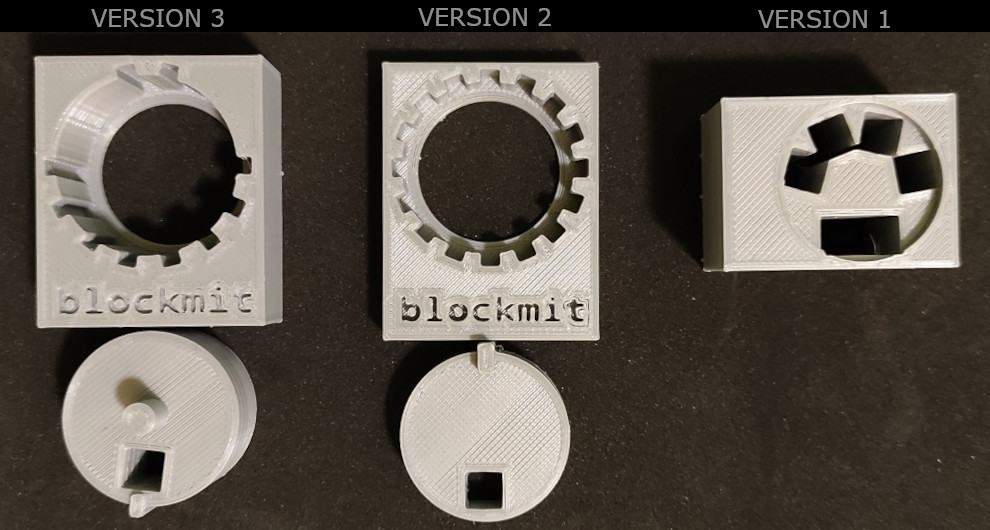
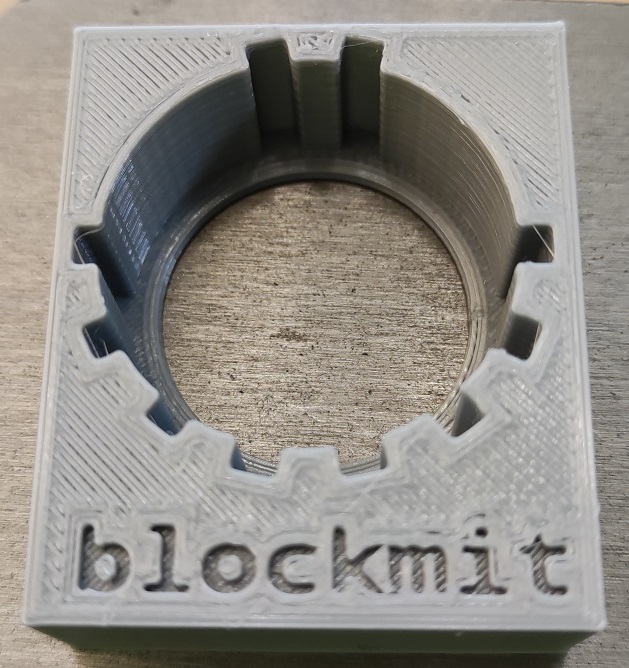
Version three, the final one, is what I was looking for.
The two upper gaps indicate the position number of the word and on the opposite side, there are 8 gaps for the whole word or if you want, use a washer for two words to save space.
We must not forget that four characters are enough to hold each word.
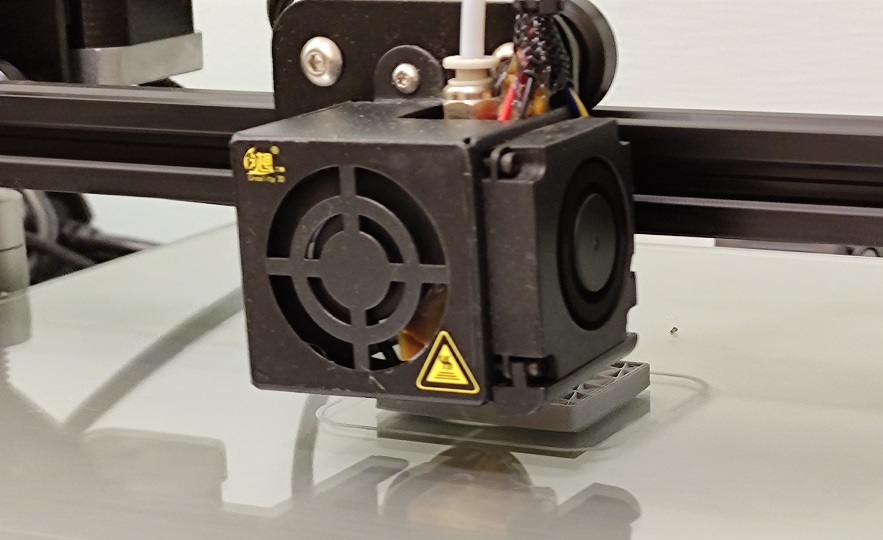
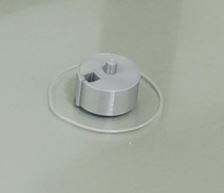
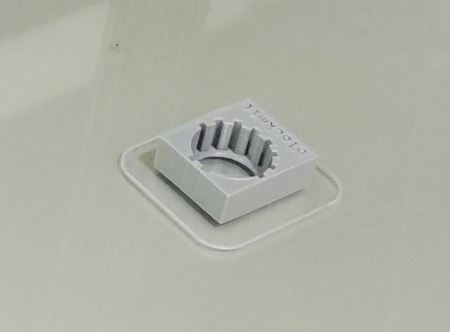
After all this creation process, it remains to print the good version by means of a 3D printer (Creality CR10S in my case, which takes a total of 1h20min):
Resultados de traducción
Printing one of the pieces
Starting the final process
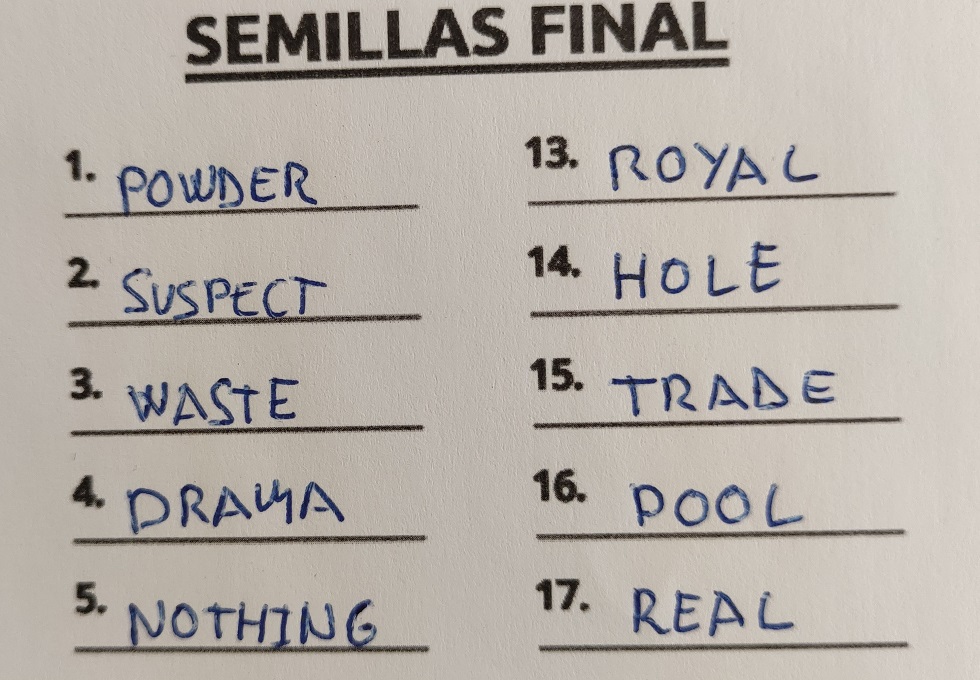
With all the pieces on the table and the much-needed hammering word sheet, you’re all set to go. In this case I use the same words that I had obtained from the spanish guide «Generar semillas BIP39 con dados» .
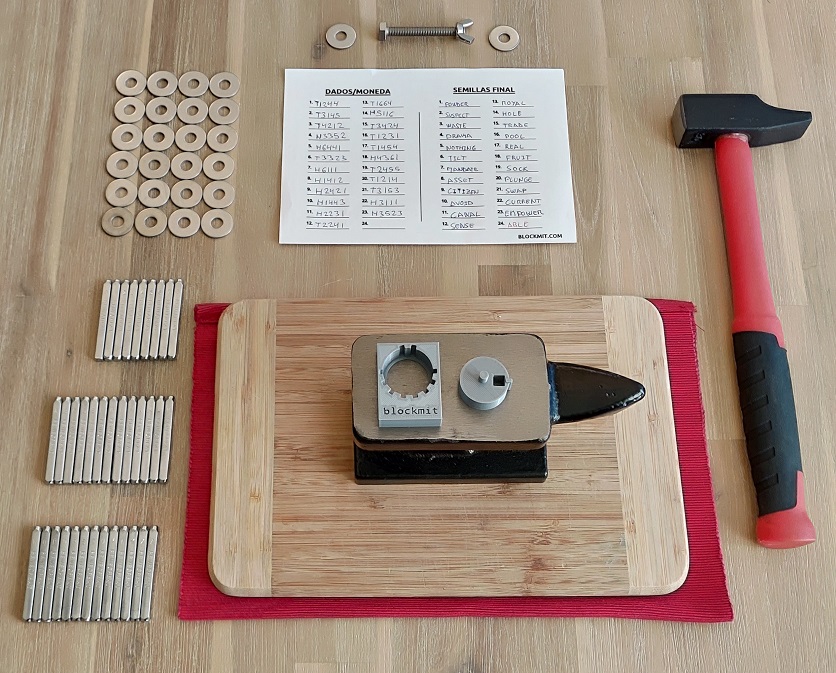
I use an anvil to hammer well and it is possible to do this on a tile or stone floor, but ideally on a piece of metal. Be careful if it is done on the floor, it will rumble the whole house 😉
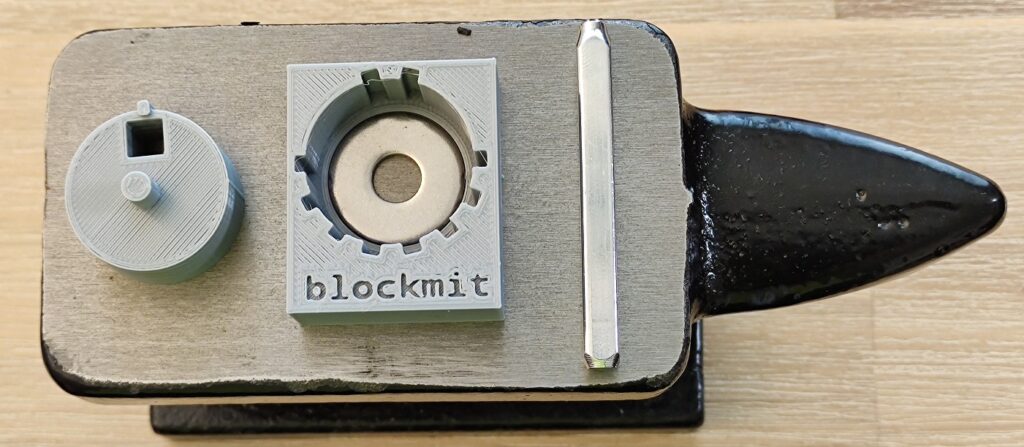
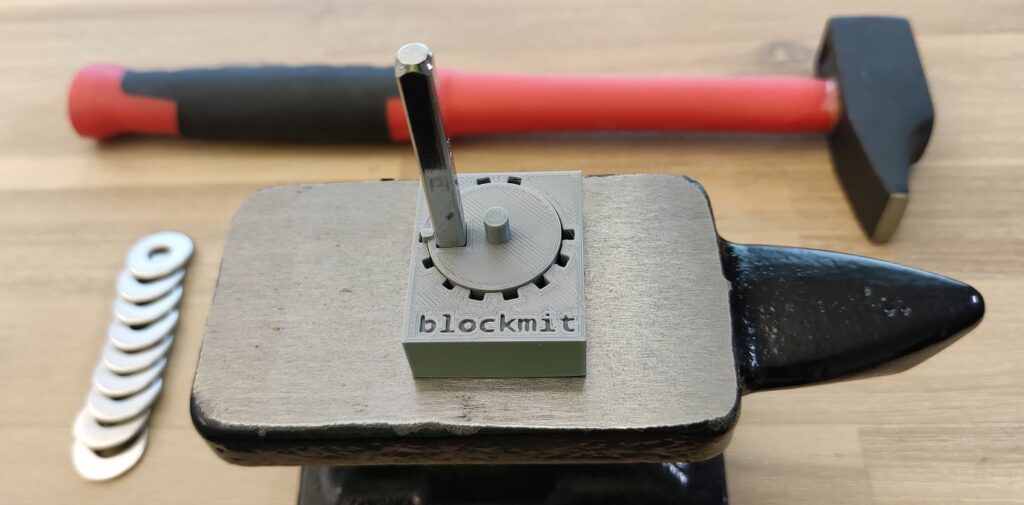
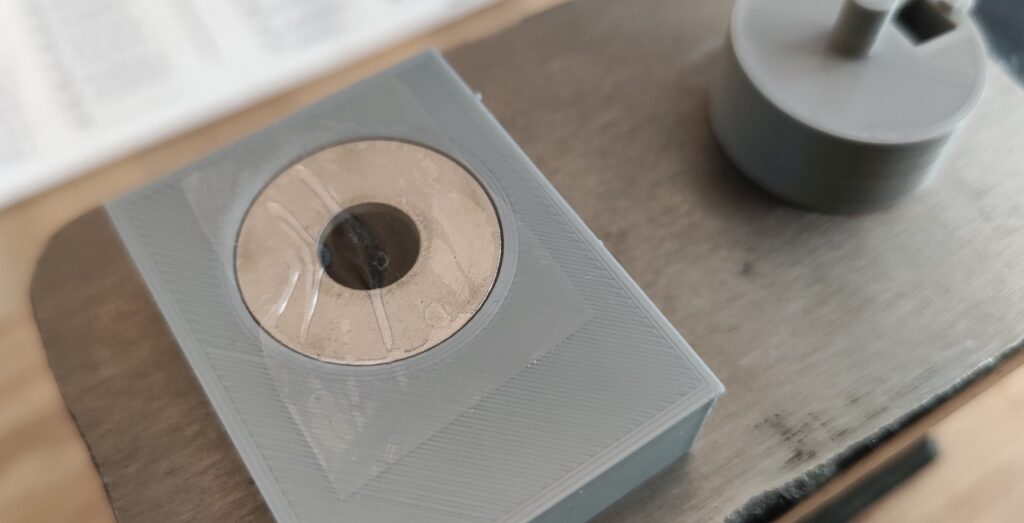
Before starting the hammering, there is a small defect in the mold I have created that I have not really been able to correct without adding anything external. And it is that when hammering the first character and extracting the moving part to do it in the second, the washer moves and the final result is quite bad. To fix this I use a little electrical tape, making the result look good by not moving the washer during the whole process.
I start with the first word on the seed sheet, which in this case is POWDER. I add the position in the upper part that would be 0 and 1, and in the opposite part P-O-W-D-E-R
I always apply two strong hammer blows, but it is a matter of testing on a test washer how you want the characters to be marked. The position of the punch is important for the correct character to come out and it is necessary to check each time the position is changed.
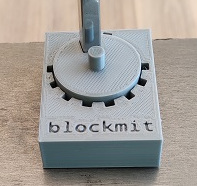
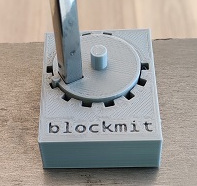
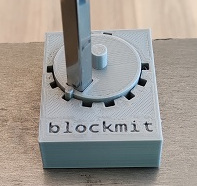
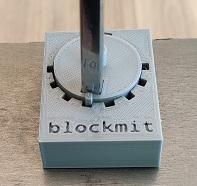
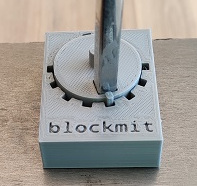
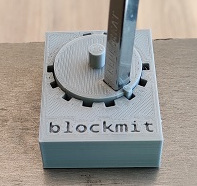
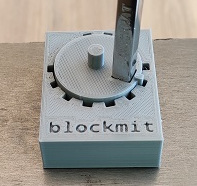
Once the first washer is finished, we can see that it has been very good.
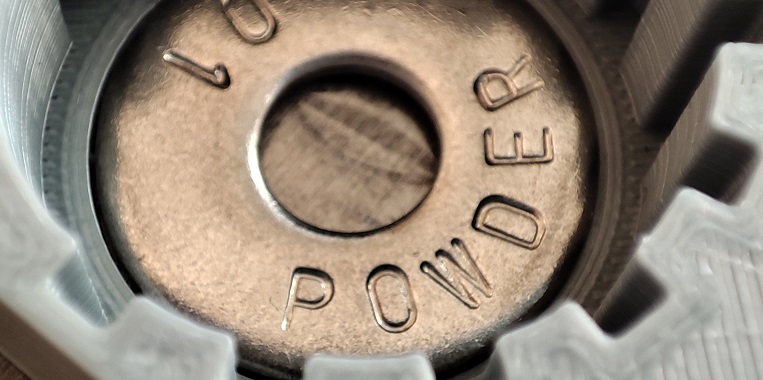
I continue with the rest of the washers and it takes about 50min, with a couple of rest stops. This time is justified by the photos I have taken for this guide and by doing it with whole words, instead of using the first four letters of each word, the time it has taken has also increased.
Hammering result
Once the laborious part of the hammering is finished and with all the washers marked, you can see that it has been very good.
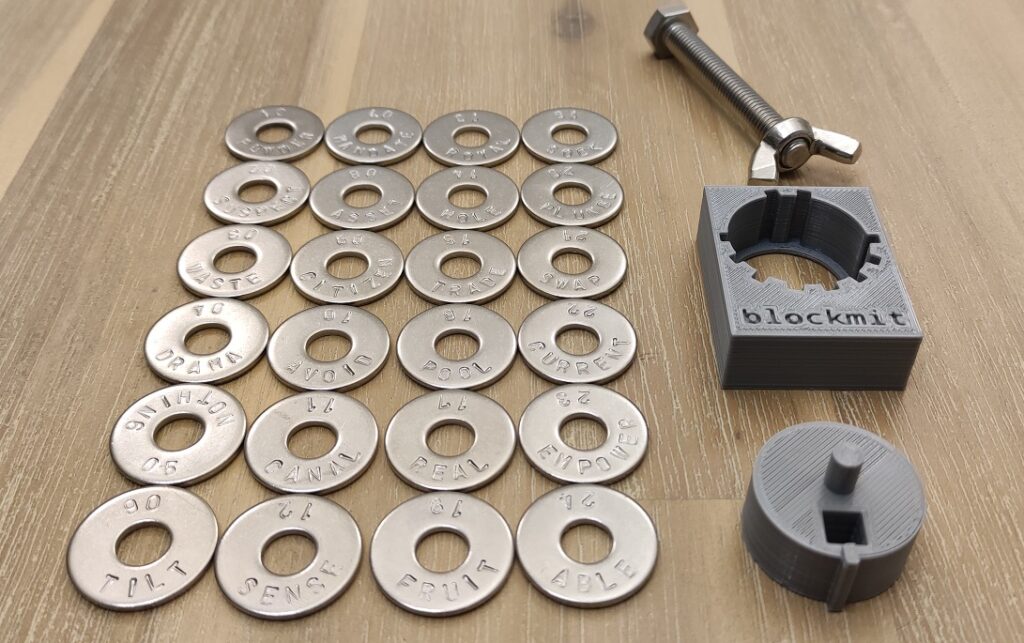
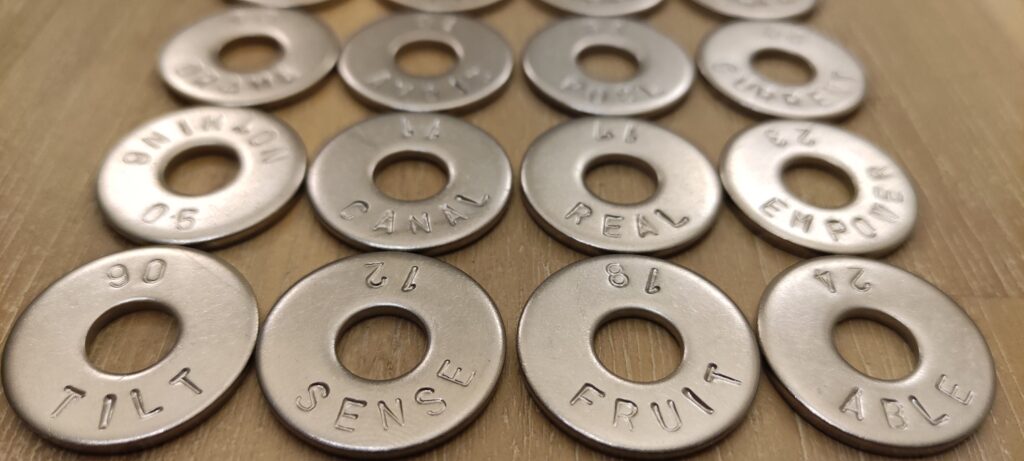
In the last washer you can see the final quality more closely:
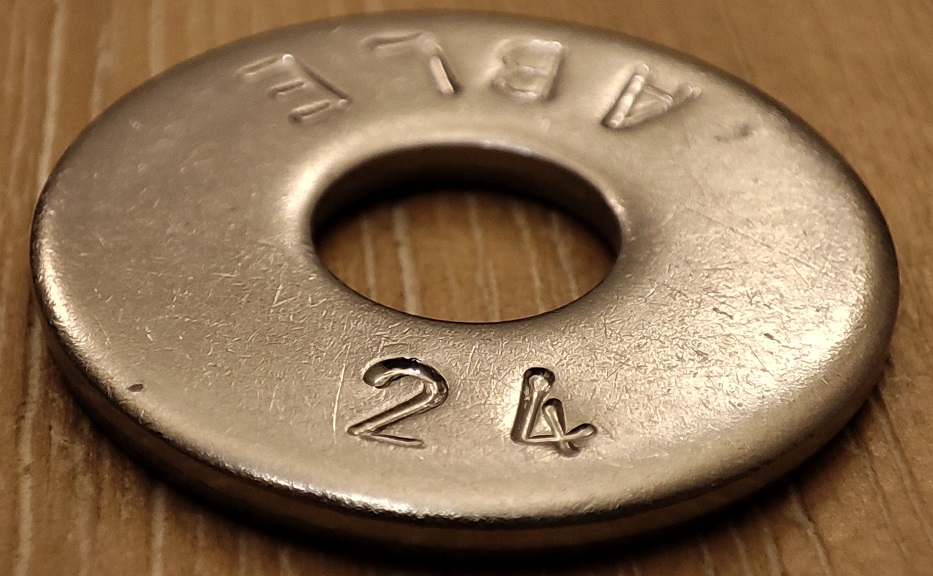
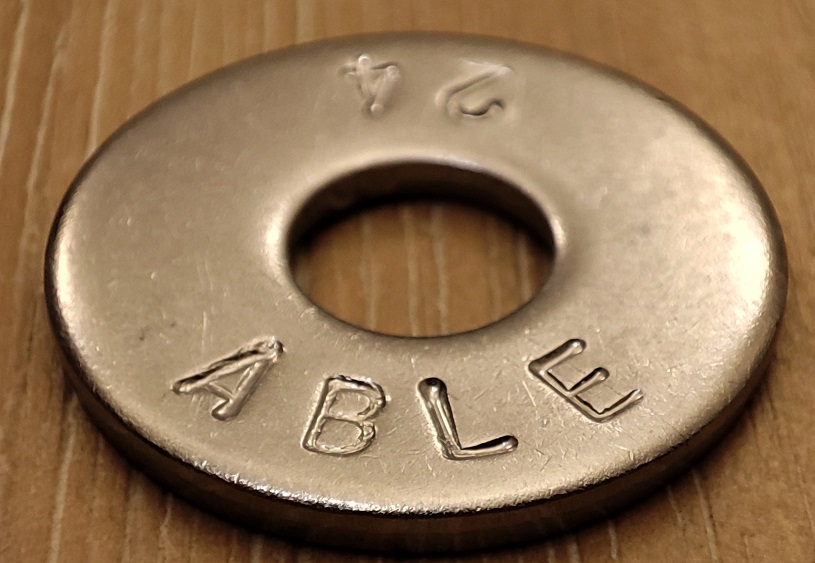
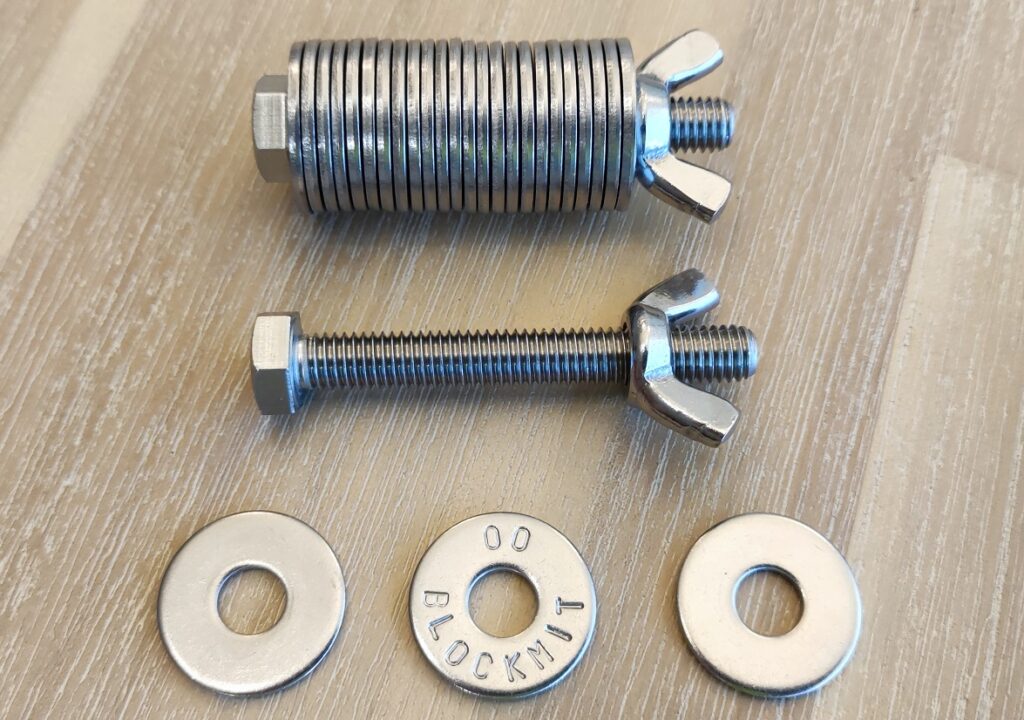
The assembled wallet with washers is very manageable, with a good weight that indicates that it is not weak at all and is ready to be kept in some «secret» place. It is also possible to buy a slightly smaller screw to use a few washers and write the «passphrase» or even use 12 words instead of 24.
Bonus Track
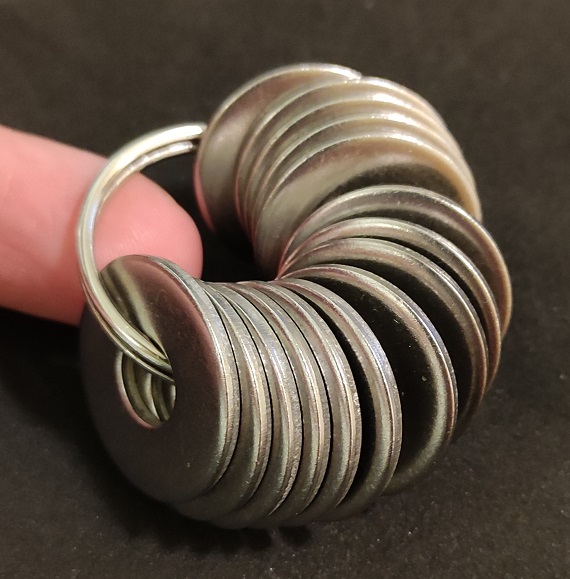
Using the screw and wing nut are perfect for storing our washers, but perhaps continuous access to our seed may be needed, being a hassle to constantly remove and put them on.
For this task of daily use, I had thought of using a ring, but I only had one with a 30mm diameter and when testing it you can see that it is too small. For 13 washers it is perfect, however maybe for 25 washers a 50mm diameter ring is required.
I leave this in case someone has this need, since I found it an interesting idea.
Ending
Finally I have been very satisfied with the results. Before starting, I thought that the washers would look bad or out of place when I marked them with the punches, but they looked very good. It is undoubtedly a simple and cheap way, which can serve to have additional support for our portfolios and avoid that due to a carelessness or accident, we can lose our funds irreparably.
I have managed to obtain 6x10x0.2cm steel plates and I will surely do something similar to this guide, designing a mold that serves to add the characters with order and in a simple way. But this is already left for future projects within blockmit.
I leave the comments open in this guide so that anyone can ask any questions they have about the processes described. The molds can be touched, modified and do what you want with them, even improve them, that surely someone with more knowledge can do it without much effort.
Where to buy the jig
WEB: https://www.cryptocloaks.com
Direct link: https://www.cryptocloaks.com/product/blockmitjig
Links of interest
incoherency.co.uk: James Stanley web, origin of this guide.
jlopp.github.io : Jlopp analysis of various steel cold wallets.
BIP39: Link to wiki about BIP39
Blockmit: Link to blockmit guide in spanish on generating BIP39 seeds with dice.
Donations
If you liked this guide and you want to donate something, you have these options to do it.
Lightning Network:
Thanks amigo!